Best DJI Intelligent Flight Modes [And how to use them]
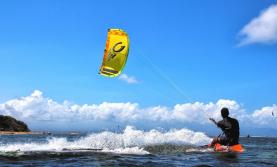
Image
![Best DJI Intelligent Flight Modes [And how to use them]](/sites/default/files/styles/article_mobile_x1_720x433_/public/2020-09/dji_intelligent_flight_modes.png?itok=Ji12lD3b "Best DJI Intelligent Flight Modes [And how to use them]")
DJI’s recent drones like the Mavic Pro, Mavic 2, Spark and Mavic Air all come with some great features as well as innovative ways to control the drone. Some of these feature are intenlligent flight models, these modes help us as drone pilots to capture stunning videos and images automaticall without actually operating the drone using the transmitter. It can be piloted using a smartphone, a remote controller as well as hand gestures! This means that you can get the perfect shot of you whenever you want without having to do it through a device.
So what are the best Intelligent Flight Modes DJI is offering?
Gesture / Quickshot / ActiveTrack / TapFly
Gesture
What is Gesture?
Gesture is an intelligent flight mode from DJI that can be found in their drones like the DJI Spark and the DJI Mavic Pro. It has made aerial filming and drone controlling much easier and removed the need to use devices to fly the drone.
With intuitive technology and deep learning gesture recognition, DJI’s Gesture Mode allows users to snap photos, control the drone, track themselves and more by using simple hand motions.
It has 2 sub modes that fliers can choose from:
Selfies
Easily let the drone take pictures of you by raising your arms, waving your hand, or making a frame with your fingers.
PalmControl
This mode is only available on the Spark and not on the Mavic Pro. The Spark can recognize your palm and then follow your hand movements. It can also take off and land on your palm.
How to use Gesture?
From the intelligent modes menu, select Gesture to start using this mode. Raise your arms and create a Y shape for the drone to lock on to you. Once that happens it will follow you around and by making a frame with your fingers you can instruct the drone to take a picture, without even pressing a button.
Before taking the picture, the drone will flash lights under its body to give you the ready signal before it actually takes the shot 3 seconds later. You can now maneuver the drone and take pictures with the drone always focused on you!
For PalmControl, power on the Spark and place it on your hand with the nose facing towards you at eye level. Press the power button on the drone two times when the yellow lights on the body start flashing, as this will activate FaceWare. Once the drone recognizes you the lights on it will flash green and it will propel into the air.
To start using PalmControl gestures, simple go a little away from the drone and stretch out your palm facing outwards. The drone’s LED lights will flash yellow if it needs you to readjust your position, or green if it has successfully recognized your palm. You can now move your hand in any direction and the drone will follow.
If you wave your arms in the air the drone will fly back and up and start tracking you. You can also use the above mentioned frame gesture to take a selfie.
Quickshot
DJI has perfected aerial technology and has found new and innovative ways for fliers to get the best pictures and videos while flying. Taking another step forward in this direction, DJI’s newest drone, DJI Spark comes with an intelligent flight mode called the Quickshot.
What is Quickshot?
Quickshot provides the ability to take smooth and stable videos of yourself without having to learn the art of flying as well as taking the perfect shot – with this mode, the drone does all the work for you.
The Spark can take professional footage and pictures of you with amazing cinematic composition. Earlier, fliers would have to practice for months to attain a level of flight control and understanding of maneuvers to get the right speed, angle and distance.
It comes with 4 autonomous flight patterns called Rocket, Dronie, Circle and Helix that make taking that right shot even easier.
Rocket
In this mode, the drone flies upwards with the camera pointing directly down. This shot makes a great way to slowly reveal the area around the subject and show a larger view.
Dronie
When using this mode, Spark flies backward and upward with the camera framing the subject at all times. This is different from Rocket because the drone is flying back and up at an angle instead of flying straight upward.
Circle
Circle is quite self-explanatory and in this mode the drone flies around the subject, keeping it in the frame at all times. While the above two modes start from a lower height or from near the subject, circle can be used to film a close up around your target or shoot from afar.
This mode is a great addition as manually performing this task is quite difficult. Circling around a target while maintaining a stable height and speed only comes with a lot of practice.
Helix
A very cool addition, this mode is like a combination of all the above. It starts like Dronie does, near the subject and then start flying back and up, also circling around the subject. With this mode you can be sure to get every angle of the situation you are recording. Fly upward, spiraling around your subject.
How to use Quickshot?
Quickshot can be used by putting your drone in P Mode and selecting Quickshot from the intelligent flight modes menu. Tap on your subject for the Spark to recognize and then from the bottom of the screen pick one of the 4 sub modes. Hit GO to start flying and recording with your drone.
Remember, that at any time you can also stop the drone from flying and just hover by pressing the red X on the screen.
Once you are done recording, DJI’s app also allows uses to edit their footage and add text and music. Then, easily share your Quickshot on social media websites.
ActiveTrack is one of DJI’s innovative and intelligent flight modes incorporated in their drones like DJI Mavic Pro and DJI Spark. Such modes have made flying so much easier and have given fliers access to a new way of taking aerial pictures and videos as well.
ActiveTrack
What is ActiveTrack?
When drones that allowed users to access a FollowMe mode came around, this was considered revolutionary for the drone and quadcopter world. This technology by DJI basically takes the FollowMe mode to another level.
When using ActiveTrack, you can track a moving object with the drone as the DJI drones have the ability to automatically recognize objects and then track them according to their speed and what the object is.
While tracking the object, the drone can also avoid crashing into things, as it is equipped with sensors and an obstacle avoidance system, allowing users to get seamless shots of their subject.
The drones come with advanced image recognition algorithms that allow them to recognize a wide range of objects whether it is people, cars or animals. By recognizing them, they can adjust their flight dynamics to match the object and take smooth shots. You can even capture fast moving objects with ease so taking a complex shot is simple.
ActiveTrack lets users follow and capture their subject, getting stable, continuous videos and pictures with a great angle while keeping the object perfectly in the frame at all times.
When using ActiveTrack, fliers have the option of choosing sub modes that allow you to get the exact shot you want. These are:
Trace
The drone can track the object from the front or from behind it and the flier can even make the drone circle around it.
Profile
Record your subject from a fixed perspective by flying parallel to it.
The above two modes are present in both the Mavic Pro and Spark, but the Mavic also has another one:
Spotlight
It allows the flier to lock the drone’s camera on the subject while they can fly in any direction.
How to use ActiveTrack?
Choose the ActiveTrack option from intelligent flight modes menu on your smartphone. You can initiate the tracking of the subject by tapping on it. If it's green, it means the drone has recognized the subject and you are ready to start flying filming!
DJI’s intelligent flight modes are as popular and loved as the drones they offer themselves, and with each new range of drones, they are sure to have a slew of new flight modes, better than before. Being the leading manufacturer of drones and quadcopters, the company now has some much needed and easy to use modes that make flying a dream.
TapFly
What is TapFly?
TapFly is one the major intelligent flight modes offered by DJI and is available in their newer ranges of quads including the DJI Mavic Pro Drone and the DJI Spark Drone. When chosen, this mode makes the whole act of flying much simpler. This is because it allows users to control the drone and fly it by simply tapping on the screen!
By tapping at a spot on the screen, you can propel the drone towards that direction or to that spot, without having to navigate it manually using a remote controller. This makes flying much simpler specially if you are a beginner or if you are using the drone for photography and videography.
This easy way to getting the drone from one place to another is not just convenient but also lets users enjoy their flying time and reduce the damage done to the drone while flying manually.
You may be wondering what if a tree or another object comes in the way of the drone while it is automatically flying. A crash or bump can be easily averted thanks to the DJI drones’ Obstacle Avoidance System that works due to the sensors present on the drone’s body.
These sensors ‘see’ the objects in the way of the direction it needs to fly and automatically moves away from it, going back to its selected direction of flight. Though this depends on the lighting conditions as well and it should not be too dark (< 300 lux) or too bright ( > 10,000 lux). The drone’s head also needs to be facing the direction of the obstacle for it to be able to best avoid it.
There are two ways to use the TapFly intelligent flight mode – Coordinate and Direction.
Coordinate
When using Coordinate, you can tap the screen and the drone will fly to the spot that you have chosen while maintaining a certain altitude.
Direction
In this, the drone will keep flying in the direction you tap on the screen.
How to use TapFly?
To use TapFly, put your drone in P Mode and select TapFly from the intelligent modes menu. As a default, it is set to ‘Coordinate’ but it can be changed to ‘Direction’ using the option at the bottom of the screen.
Pick one of the modes and then hit GO to start flying your drone to the particular spot or direction. In between the flight, you can change the place it is heading to by tapping to another location or dragging your finger on the screen to change direction.
Remember, that at any time you can also stop the drone from flying and just hover by pressing the red X on the screen.