Prepare Your DJI Mavic Pro Drone For Its First Flight
Image

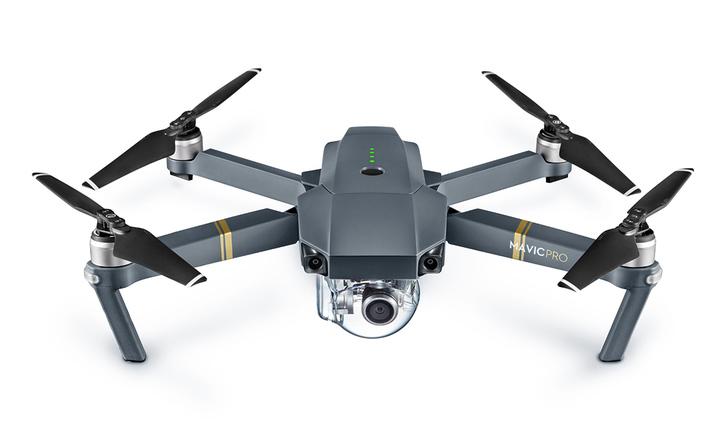
Seeing the widespread use and popularity of drones and quadcopters, if you too have joined the bandwagon, then there’s no doubt you have a couple of questions. If you are lucky enough to own one of the best drones in the market right now, the DJI Mavic Pro Drone, then there are a couple of things you need to do in order to prepare your drone for flight.
Flying for the first time is very exciting, but also as scary because you don’t want to crash your drone in the first go and ruin it. If you are still learning, there is a high possibility that you can crash it, so make sure to run through the checklist at every step, to ensure a safe and secure flight!
Unbox and set up
Very obvious, but unboxing is the first step to preparing your drone! There is a lot of excitement when you first open the package and you need to make sure you remove all the parts of the drone, as well as the manual carefully. Ensure to keep the small and necessary parts safely and not lose or break anything when opening the package in a hurry.
Once out, inspect your drone thoroughly for any damage while shipping. While it is unlikely, it is always a good idea to check before you start flying.
It is important to remove the camera clip and camera cover that the drone comes with for safe transportation. It is imperative to remove the clip, but the camera cover can be left on for extra protection. Though, keep in mind light on the cover can lead to a glare in pictures and videos.
Next, add the propellers to the drone and also set up the controller and smartphone by attaching the two because the screen will provide an FPV of what’s being recorded.
Know more about DJI Mavic Pro Controller Phone Size Compatibility.
Checklist -
- Remove all stickers and covers
- Remove Gimbal Clip
- Remove Gimbal Cover
- Check drone controller, battery, body and camera for defects
- Attach necessary accessories carefully
dji_mavic_pro_-_preflight_checklist
Charge and update
The next step is to make sure your drone is fully charged to help provide, maximum flight time. Charge the controller as well to use along with it for flying conveniently and changing and making adjustments to settings.
The battery for the drone easily plugs into the power supply and charges automatically. After the charging is complete, the lights on the battery also turn off to notify you. For the controller, users can charge it by attaching a micro USB cable on its left side and plugging it into the Mavic power supply.
To update the drone, download the DJI Go app on iOS or Android, and there will be an option to update the firmware. It is recommended to update these settings, as DJI regularly sends updates that help in providing an easier flight experience. Make sure you have a strong Wi-Fi signal as well because these updates can take up to 30-60 minutes.
Checklist -
- Charge drone
- Charge controller
- Upgrade DJI Go App
- Update Firmware
dji_mavic_pro_-_upgrading_firmware_dji_go
Calibration
The Mavic Pro drone comes calibrated to an extent, but it is a good idea to calibrate it once more for precision and no mistakes. Users have the option to calibrate the internal compass, the gimbal and the controller for a smooth flight.
The app lets you know in case calibration is required, but before calibrating the compass, make sure that the arms are unfolded or they can interfere in the process. Using the sport mode too can help with the calibration of the drone.
Checklist -
- Check calibration on DJI Go app
- Calibrate drone compass
- Calibrate controller
- Calibrate gimbal
dji_-_mavic_pro_-_calibrating_the_controller
Adjust camera and flight settings
Adjusting the camera and light settings depends on your preferences of flying and recording media. Using the DJI Go app, you will have a number of camera settings to adjust, such as gimbal sensitivity, ISO and shutter speed.
Once you get a fair idea of how to handle the drone, check the different setting and change them as you prefer. There are also a number of preset exposure settings to adjust the camera to light conditions, and lowered gimbal sensitivity helps in providing smoother and more professional footage.
The Mavic Pro features a number of flight modes for easier flying by beginners as well as experts. Catering to a number of functions, you have to figure out which mode suits you best after having flown manually for a while. Try them all and get a taste of the various things your Mavic can accomplish.
Modes such as Tripod allows a better flight indoors while ActiveTrack follows a particular subject and Orbit hovers around the subject.
Checklist –
- Enable Multiple Flight Mode
- Set RTH Altitude
- Set Maximum Flight Altitude (Check 400 ft)
- Change advanced Settings – EXP, Sensitivity, Sensors, Smart Go Home
- Adjust Visual Navigation System, RC Control Settings, Aircraft Battery, Gimbal
- Check General Settings
httpswww.youtube.comwatchvvugt9vfd6ky
Start flying!
Before you begin your flight, attach any safety gear you may have such as propeller guards, landing gear or gimbal guard.
Power the drone on, as well as the controller with the smartphone attached, and simply start flying! Get used to the controls and speed of the drone as well as its response time. This experience will better help you in making changes and adjustments to the drone.
It is a good idea to start flying in a known and open space, where there are no obstructions or people in the way. Flying outdoors first is a better option to learn flying.
The drone features a clever Return to Home function that will allow you to recall the drone back to its starting point automatically. Ensure to keep the return to home height to something suitable for where you are flying. As a rule, the higher the better so that it doesn’t crash into any trees or buildings.
Checklist -
- Confirm VPS reading
- Verify gimbal wheel, Exposure wheel, C1 button, C2 button, 5D button
- Check Pitch response, Roll response, Throttle response, Yaw response
- Pick flight mode as per necessary
dji_-_mavic_pro_-_how_to_fly
Using the camera
Once you are confident about your flying skills, the next fun thing to do with your DJI Mavic Pro is to start recording videos or taking still pictures with it! The 4K camera is one of the best in the market and combined with the features, modes, and setting, there isn’t anything simpler or better you could ask for.
The app features a red or white button on the right, where pressing the red allows you to start recording, while the white takes pictures. The interface is very similar to that of how you record media using a smartphone so it doesn’t take more than few seconds to catch on.
Below the record/ picture button is the camera settings that will help you achieve the best possible results. Tap on the screen to focus the camera on particle spots. The SD card inside the drone will allow you to have all your pictures and videos as well.
Checklist -
- Check camera and gimbal settings
- Turn on record
- Change settings as per necessary
this_is_amazing._mavic_pro_4k_footage
Now that you are all set up and ready to fly around, the next step in your drone flying journey should be to invest in some of the top DJI Mavic Pro accessories to have. You also have the option to opt for the DJI Care Plan for insuring your drone and easier drone-related services.


